January 29, 2018

Let's create a JOURNAL BACKGROUND using SHIMMERZ COLORINGZ


I'm up on the Shimmerz blog with my first blogpost and video for the Shimmerz Education Team. I have started a new to me form of memory keeping for 2018 in my weekly vertical traveler's notebook insert from Midori. And I love it, I love spending a little time creating a colorful mixed media background before the week starts and I love using stickers, ephemera, practically everything that I can find around the house to decorate the weekly spread when I journal daily about my day! It is so much fun and doesn't take a lot of time out of my day so I have actually kept up with it so far! I hope that I can carry on way beyond the first excitement of January and share my spreads every week on Instagram using the Hashtag #seemownaysweek.


For this spread, I wanted to try the Blow Painting Technique with a straw! I remember doing this as a child and thought it would be fun to try out my new COLORINGZ and see how well the paper takes the mists. I wanted to create a rainbow effect, so I pulled out a piece of packaging as a palette and added the first color. I then took it up with a brush, added a colorful blob to the top of the page and then used my straw to move the color down the page. I actually turned my insert upside down to be able to control the paint better. Then I just went on, adding the different colors and mixing them along the way to get a bigger and more colorful palette.


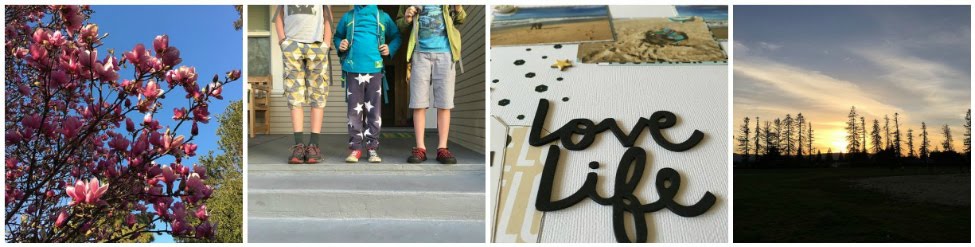
After prepping the background, I went through my stickers and my ephemera and created a little kit to use throughout the week. Then each night when I sat on the couch I would pull out my traveler's notebook and quickly journal about my day, adding bits and pieces as I wrote. This photo shows the progress after the first days. Isn't the quote by Ralph Waldo Emerson on the tea tag just perfect? I love it: "Earth laughs in flowers." I never paid any attention to the tags on my tea bags before and didn't even know they hid little treasures, but that day it fell into the hot water and so I had to get it out with a spoon. And there this beautiful quote was waiting for me. I dried it with my heat tool, remembered that I had just seen this beautiful die cut in my stash, pulled it out and stuck it right into my journal.


Whenever possible, I tried to match my stickers and ephemera to the rainbow background to intensify the rainbow effect! I absolutely love how this all turned out! Unfortunately, this was the week when I had to record my very first trip to the ER since moving here. Luckily, I'm back to walking at the moment and hoping that I can omit knee surgery. The accident happened on Friday night but as you can see, I'm not too strict when it comes to sticking to the given page design: I just add my journaling wherever I think it fits best into my own design.


After I was done with my journaling, there was still lots of empty space left at the bottom of the page, so I decided to add a quote that relates to GO, my word for the year 2018. I love collecting quotes and never know where to put them. Adding them here whenever and wherever possible, makes them more visible, which I love.


Here is another look at the finished page. It's so much fun to do, it doesn't require a lot of material and time. And the best part for me is that I am less intimidated to try different techniques. Often I am paralyzed by the size of bigger projects and don't even know where to start. Now that I have seen how easy it is to create such a fun rainbow background, I am thinking about trying it on a larger canvas. What do you think? Wouldn't this be fun as a a background for a 12x12 layout?


Here is a link to my process video on youtube. If you place an order in the Shimmerz Store, don't forget to mention my name Simone in the comments at checkout to receive a free mini surprise product! Thanks for stopping by today!

SUPPLIES:
Coloringz - Don't Citron Me, No Yoking, My Bleeding Heart, Pink Stilettos, Heidi Ho Blue, Well Blue Me Down

January 26, 2018

What is a CURRENTLY album? And why is it the perfect beginner's project!


In 2017 I started to record a list of "currentlies" in my Daisy Dori inserts from Cocoa Daisy and loved seeing how they changed or stayed the same every month. For 2018 I had the idea to use a 6x8 album for my currently lists, this would give me more options to play. I could do full page photos, full page lists, put my lists into pockets, leave it plain and simple and just have fun. I could be really artistic with colors and stamps or I could type it out on a typewriter or use my computer or just a plain old pen. Whatever the current mood, I could do.

I also wasn't afraid of adding yet another project to my ever growing list of projects because in the end, the only thing I really have to do for this particular one is write a list of things that I am currently ...

And this is where you come in! If you have been on the fence about this whole scrapbooking stuff and journaling also seems way too intimidating, I think this is the perfect project for you to get your feet wet. Depending on your preferences you can use a binder from the office supply store or a journal that you have in your stash. You can use a scrapbooking album or a traveler's notebook, this all depends on your personal preference. And then just start!

Here is a list of categories that you can record each month, I bet there are even more. Pick some or use all and get recording! January is the perfect time to start this project:
  • wearing
  • reading
  • planning
  • watching
  • cooking
  • eating
  • crafting
  • going
  • loving
  • dreaming
  • feeling
  • listening
  • drinking
If you want to add photos I recommend you start by just focussing on one favorite thing per month and take a photo and print it. Stick it down and write what you love about this right now. On the next page add the rest of your current favorites for the month. And then come back the next month and do it again! See how easy this is? And see how you can be as artsy or crafty as you want to be?


As I told you above, this year I want to use a 6x8 album for this project. I have started with a title page yesterday and am sharing the creative process on youtube. I am so excited, this is going to be so much fun! I will be recording some other things in this album too but the only goal I have is to record one currently list each month. Everything else in that album is just the icing on the cake.

I hope I was able to inspire you today!

January 15, 2018

"Bärenweihnacht" - Stuck?! Sketches


I had so much fun working on Christmas-themed layouts during these past two months. And combining them with the amazing sketches from Laura was exactly the right amount of Christmas scrapbooking and left enough room to work on other non-Christmas projects. For this sketch of the January 15, 2018 challenge for Stuck?! Sketches I was able to try yet more new things.


If you watch the video that is linked down below, you can see me making some pretty rookie mistakes. That's why it was so hard to take a picture of the finished layout because it wouldn't lay flat. I stayed very close to the sketch and only changed minor details. During the past weeks I have been greatly inspired by Missy Whidden, so I had to use some mists and gold thread on my layout. But let me tell you, it looks much easier to make the perfect thread nests than it actually is. The thread would always untangle before I was able to stick it underneath a layer.


Here is a closeup of the labels and word strips that I piled upon the title. I felt something was needed to balance the layout and connect the top embellishment cluster with the title. Since I used the big star as a focal embellishment in the bottom cluster, I repeated the star theme along the stitched circle at the top left side.


And finally, here is a look at the right embellishment cluster that I changed after I filmed the video. I had found the deer after I considered the layout done. When taking off the other die cut, I accidentally ripped the star so I needed to add more layers in order to cover the mistake. To finish the layout I added some more splatters of the two Shimmerz mists that I had used: Coloringz - Chocolate Brownie and Vibez - Glorious Day. If you order from their website don't forget to mention my name in the comments to receive a surprise gift with your order.

Here is a link to my video on youtube where you can see how this layout came together. Please make sure to check out the Stuck?! Sketches blog and have a look at all the other layouts by the Design Team. We would love for you to play along and link your layout to the link up to win some lovely prizes!

January 10, 2018

Cocoa Daisy Memory Keeping Kits "Always" - January 2018

Hi there! Today I"m sharing a closer look at the January 2018 Memory Keeping Kits "Always". They are the perfect combination of love and winter and will help you get your memories onto beautiful paper and into your albums!


This is one of my most favorite cards of the Memory Keeping Pocket kit! The designs on the cards are so versatile. Several have beautiful quotes and sayings printed on them that you can easily use to make cards or tags and send some love notes to friends near and far.


This die cut from the Memory Keeping Kit is a great prompt to journal about your status quo! What are you currently doing, loving, watching, reading, feeling? Take photos of your everyday life and document where you are at "right now' - these snippets of life are always so great to look back at.

The next three photos show some of the different paper combinations that spoke to me while I was filming the unboxing video.


What do you think about this combination? A busy, colorful pattern, combined with a larger patterned and an almost solid?


Or what about this? It's very dramatic with those bold colors. But it would still work with a smaller pattern contrasting the larger hearts. Maybe it would even work on the awesome mixed media background! I love papers like this one: you don"t have to do the intimidating mixed media stuff, it"s already there!


Now last but not least this paper combination! I think this one with the bright yellows calling for Spring is my favorite of them all! What is yours?

Here is a link to my unboxing video, I would love for you to check it out! What are your plans for your kits? Did you see that there are still some Memory Keeping kits and pocket cards left in the store? Right now, I think I am going to start with one or two spreads in my Project Life 2016 album, I am still catching up and those cards and embellishments are just perfect. Then I would love to create another mini album, a bit different than last month's, more structured. I'd love to capture one highlight from each month of 2017 and create a "Best of 2017". How about you? Have you created a 2017 review layout yet? And then finally, if there are still papers and embellishments left, I might start another new project. Hahaha. As if I hadn't enough already! I would love to hear about your ideas and plans for the kits in the comments! Thanks so much for your time! I'll see you next month!

January 1, 2018

"Nikolaus" - Stuck?! Sketches


Happy New Year! I'm so excited for this new year to come! I'm going to start it off with yet another Christmas themed layout for Stuck?! Sketches. This sketch designed by Laura Whitaker was quite challenging for me.


But I'm happy that I persevered and tried anyway because I really like the way this layout turned out. I used gesso to prep the background paper and then went to town with mists creating this breathtaking look at the night sky. At the bottom I added a row of houses that I fussy cut from a patterned paper.


To bridge the gap between the title and the embellishment cluster, I added a strip of patterned paper and then fussy cut the trees from a 6x6 cut apart sheet. I really love the whimsical touch this adds to my layout.


To tie the bottom part of the layout in with the night sky I later added mist splatters and puffy stars. Here is a link to my video on youtube where you can see how this layout came together. Please make sure to check out the Stuck?! Sketches blog and have a look at all the other layouts by the Design Team. We would love for you to play along and link your layout to the link up to win some lovely prizes!